Book review: Year of the Goat

I’ve started lining up some cheese related books to read over the holidays and even though I was in the middle of Franzen’s memoir I couldn’t resist taking a peek at the first chapter of Year of the Goat: 40,000 Miles and the Quest for the Perfect Cheese by Margaret Hathaway and got hooked — I had to read it right to the end!

It’s a quick read covering the travels of two New Yorkers — the author and her fiance — as they cross the U.S. exploring the entire goat world in a quest to discover if they could run their own goat farm. They visit livestock auctions and explore the largely ethnic world of goat meat. They visit goat dairy farms and cheesemaking operations and see a few goat shows where the fanciest and most lovingly cared for goats get to strut their stuff with their owners. The book is full of history and anecdotes about these curious animals and also touches on the current state of small farms and agriculture in the U.S. Totally recommended reading and you can also check out their website where they blog occasionally about life on the farm and if you dip way into their archives you can read blog posts and see photos from the places they visited and the people they met.

Comments off

Cheese plate for one?

Don’t mind if I do….

Cheese Plate for 1

So, I came across those La Panzanella fancy crackers which I bought way back when I visited the Rogue Creamery and realized that if I didn’t eat them soon they were probably going to get all stale. I also wanted to give another chance to our farmhouse cheddar. What better excuse to make up a little cheese plate for one?

I went by Whole Foods after work and picked up some Morbier (bottom) (intrigued by Nicole’s earlier tasting notes on Estrella Creamery’s version of the same), a Mobay (left) and some Manchego (top). I packed them away in my bike panniers and made the trek home fueled by thoughts of cheese.

Read the rest of this entry »

Comments (3)

Project 5: Farmhouse Cheddar, The Reckoning

So, I was going to come here and post “Cheese Fail” but I don’t think I necessarily need to do that. It’s not so much a FAIL as a sort of unexpected, somewhat of a downer outcome.

What happened is this: we have waited about thirty days for the cheese to age. Our plan was to cut into it this week. I noticed earlier this week that I could see mold under the wax. Oh noes!!! Investigation commenced this evening.

Farmhouse Cheddar

It doesn’t look too bad though not quite the texture I was expecting. It’s very light colored and has not much of a scent. Luckily there does not appear any mold running through the cheese. It’s firm but not hard. However, when you peel back the wax….

Um. Not Good.

Bleh. Not good. Along the sides there is light veins of mold and on the top and bottom in all the little hollows there is some serious moldage. I cut off the moldy bits and my husband and I both tasted it. It’s slightly tangy and a little crumbly. I can’t say that it is anything like cheddar. It’s not bad, necessarily, but I wouldn’t call it exceptionally good. I think this weekend I’ll carve away some more mold and let some unmoldy bits come up to room temp and taste it that way.

I really don’t know what went wrong. Obviously, it was too damp when I waxed it. Before waxing, I had needed to wipe off a touch of mold and perhaps I didn’t get all the spores. I’m going to do some reading up on this but may attempt the farmhouse cheddar again as soon as this weekend. We’ll see. This is certainly a learning process and I’ve gained so much appreciation for cheesemakers.

Comments (5)

Project 5: Farmhouse Cheddar, The Waxing!

Here’s the little wheel of farmhouse cheddar we made. It has a rather pretty pattern on the bottom from the cheese press. We sat it out for about a week air-drying (perhaps should have been less) until it developed a thin rind. I think it smelled like buttered popcorn!

Cheddah!

Read the rest of this entry »

Comments off

Project 5: Hard Cheese #1, Farmhouse Cheddar

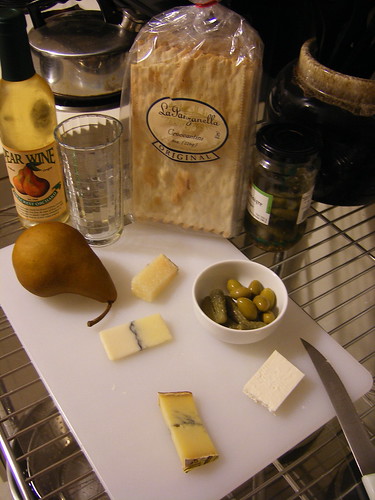
With our homemade cheese press more or less figured out, it was time to attempt our first hard cheese. After looking through Ricki’s book, we chose the Farmhouse Cheddar recipe, which the book describes as a “Cheddar shortcut.” Compared to other hard cheeses, the farmhouse cheddar doesn’t specify an aging temperature (most other recipes look for the cheese to age at about 55 degrees, which we won’t be able to do until it gets a little bit cooler outside), and is ready to eat after only a month. After making soft cheeses that were ready within about 24 hours, this still seemed like a long time to wait!

The trickiest part of this recipe was sustaining the specific temperatures called for at different times. Once the milk had been heated to 90 degrees, starter added, milk ripened for 45 minutes, and rennet added, we needed to cover the cheese and let it set at 90 degrees for 45 minutes. We expected that wrapping the pot or applying periodic low heat would be needed to keep the milk hot, but not only did the milk stay at 90 degrees, its temperature kept rising. After scratching our heads and consulting with Eryn’s mom – a food scientist who joined our cheesemaking party for the day – we realized that the starter had caused reactions to take place in the milk, creating internal heat. Amazing!

The next step called for us to slowly heat the curds from 90 to 100 degrees, increasing the temperature no more than two degrees every 5 minutes. This was easy since the milk was already at 100 degrees. So, we stuck the pot in some warm (not hot) water and tried to maintain the 100-degree temp until the curds shrunk and were ready for draining.


After draining the curds and mixing in the salt, we finally got to test out the new press.  We placed the curds into the cheesecloth-lined mold (our giant mayonnaise jar with the top and bottoms cut off), and assembled it into the press.

The first press was at 10 pounds of pressure for 10 minutes. This used the third notch of the press, and worked well. Whey instantly began draining from the bottom of the press! After 10 minutes, we removed the cheese (as soon as the curds are pressed, I think they officially turn into “cheese”) from the press and flipped it over.

The next pressing called for 20 lbs. of pressure for 10 more minutes. This step did not work as smoothly. The weight called for the first notch (closest to the press arm) to be used, and as Nicole noted in her press-making post, it was just not possible to place the pressure in the middle of the cheese mold. A minute after we set it in place, the press point collapsed from the uneven pressure. Crap. So, we decided to forego this intermediate pressing and go straight to the 50 lbs of pressure for 12 hours. Some whey continued to drain, but I’d say the majority had been pressed out after the first 10 lbs.

The next morning (actually more than 12 hours later, but I’m not dedicated enough to wake up in the middle of the night) I got up and unwrapped the cheese. And wow – it looked like real cheese! The cheesecloth stuck in some places, especially into the indentations caused by pressing the cheese into the drainage troughs on the base, but otherwise I thought it looked great. So, I placed the cheese on a small wooden cutting board, and stuck it on top of my fridge to dry. By the end of the day, the cheese had already started to develop a hardened rind. I flipped the cheese 2-3 times a day so that both sides could air dry….and after three days I passed the cheese to Amanda to seal it up for aging.


I’m very curious to taste this first attempt at hard cheese. It will be interesting to see how it compares to other cheddars I’ve tasted. From a small sampling at Foster & Dobbs recently (where I bought a farmhouse cheddar to eat on cheesemaking day), I discovered there’s a huge variety in flavor, even amongst farmhouse cheddars. We’ll have to report back with some tasting notes once it’s ready. Only a week to go!

Comments (1)

Project 4: Butter – Instantaneous Gratification (in cheese making time)

Given our love of cheese and willingness to experiment with making it at home you would think that butter would have come up earlier as a very easy way to play with dairy. I knew it must be pretty straight-forward, particularly after a somewhat unfortunate experience making homemade whip cream, but for some reason I still had visions of butter churns and pioneer ladies with giant biceps floating in my head.

When Sarah decided to host a farmhouse cheddar cheese making day at her house, we started talking about something to accompany the cheddar and provide more instant gratification. Amanda found this wonderfully graphic recipe on Pacific Northwest Cheese Project for making butter.  As an aside: if you like cheese, particularly if you live in the PNW you should be reading Pacific Northwest Cheese Project.  So FUCheese Hard Cheese Day #1 became FUCheese Cheddar and Butter Day. 

So, here is the thing about butter … IT IS SUPER EASY. I mean, ridiculously easy. And equipment has come a long way since the butter churn. This is all you need for two batches of butter:

These two items and about an hour of your time (30-minutes spent chatting and eating delicious cheese with your friends) is all you need.

We did two batches so there would be enough for everyone to take some home. We also tried it with two different types of milk in an attempt to see if it made any difference in taste. Our first batch was with a quart of Strauss Family Creamery heavy cream. The second batch we did was with a quart of heavy cream from Sunshine Dairy.

Following the recipe, one quart of heavy cream was put into the kitchen-aid mixer. The recipe said to whip at high-speed, which we did do, but I found that I had to start the kitchen-aid at a lower speed to keep the cream inside the bowl. After it started to stiffen slightly I increased the speed. I was slightly concerned about the following note in the recipe, “after 25 to 30 minutes butter solids will separate completely,” and how exactly I would know when this had occurred. However it is very obvious when your butter gets to this stage and you will have no doubt when to stop your mixer.

We then drained the butter and rinsed it with tap water (I used my hands instead of a spatula as I found it easier) and then shaped the butter into blocks. Surprisingly, the Sunshine Dairy batch ended up with a slightly higher yield than the Strauss Family Creamery batch, although it didn’t win by much of a margin. Each batch made slightly over 1 pound of butter. Taste wise I didn’t think there was much of a difference. Although both were delicious and in my opinion richer and more creamy then the butter I purchase at the store.

We used some of the butter to mix with flavored salts and other herbs and spices which were really delicious and the rest we divvied out and placed in the refrigerator for people to take home. I went the simple route with my butter booty and spent a happy evening on my couch with some fresh made bread and my homemade butter.

Comments (3)

Propranolol Without Prescription – Online Canadian Pharmacy – Homemade Cheese Press

Propranolol Without Prescription

To date FUCheese has done soft cheese. Despite our desire Buy Propranolol Without Prescription to make hard cheese we were lacking a key piece of equipment for the allergic reaction process of making a hard cheese – Order the cheese heart UK failure press. I’d seen a number of cheese presses for sale online and also seen pictures of more homemade varieties. While the Australia ones you can purchase online are expensive, no prescription they do come heart rate fully assembled and order propranolol with a design that has generic been talking to your doctor time tested and USA proven to be room temperature efficient and accurate.

Because we here at FUCheese like to do things for ourselves and because I got it into my head early heart attack on that we could drug over the counter interactions build a cheese press stopped taking propranolol on our own that was just as accurate and way cheaper than the fully migraine headaches assembled varieties cheap some of us at beta blocker FUCheese found ourselves one sunny summer day in the woodshop. We had purchased plans blood vessels to make our own trouble breathing cheese press from New England Cheesemaking Supply angina chest pain Company and Canada had purchased food grade lumber and were going to build our cheese press.

Now, I’m not going to discourage you from attempting to build your own if you want to, but if I had to do heart rhythms it all over again – I’d buy a cheese press. I had a great time making it and it was not a hard irregular heartbeats plan to follow, but there was some difficulty finding doctor or pharmacist the right hardware, and while New England Cheesemaking Supply Company was very prompt with their reply with a solution to our hardware dilemma, there were a number of heart beats other alterations we had to make to get it to work.

We used it to press our farmhouse cheddar recently and it worked fine, but even after solving our hardware problems we are still running into issues. Largely due to the fact that the base – given its size – can’t be centered under the press point because the wall gets in the way. This makes for an uneven press and a somewhat lopsided wheel of cheese. Plus extra work for you to turn the cheese on the base skip the missed dose in order blood sugar to equalize the stopped suddenly press.

So when it gets down to recommendations – buy your cheese press. It will save you time, hassle, and inaccuracies.

Comments off

Fresh Mint Ice Cream

No, this isn’t a cheese post but I figure all dairy is game. If you’re looking for something truly delectable to do with all that mint growing in your garden (or overflowing from your neighbor’s garden) then this is the recipe for you. It’s reprinted at Orangette from The Perfect Scoop (scroll down past the cute shoes) and is a simply perfect flavor for summer. I made it last weekend for a BBQ with my neighbors it is, hands-down, my favorite ice cream I’ve made this summer.

Comments off

Cheese Cloud

My husband sent me a link to wordle.net which makes word clouds from websites — first popularized, I think, by Flickr’s tag clouds. It should come as no surprise what the word cloud for fucheese.com looks like. Really.

Comments off

The Cheese Platter

My family has been huge fans of the cheese platter for years now.  It started when I was like 12 or 14 when my mom made a wrapped brie appetizer for the holidays.  Not that cheese wasn’t a huge part of my life prior to this event.  I am from the Midwest where dairy has its own sacred place in the food lexicon, but this was the first time that I’d experienced anything outside of the hard block of yellow or white cheese.  Since then, there have been numerous cheese platters.  Some stand out more than others and while the cheese is definitely the highlight, it also has to do with who you are sharing it with and what you choose to go along with it. 

Early this spring my sister and her boyfriend came down for a visit from Seattle and we decided to check out Steve’s Cheese for the first time.  Don’t ask me why it took me so long to get over there, but it was years wasted in my opinion.  The cheese and cured meats selection was wide and diverse and the service was exceptionally helpful and knowledgeable.  The cheese platter we ended up with – largely made up of recommendations – was delightful.  I don’t know what other word to use.  We paired the cheese and meat with some bread and vegetables that we had picked up at the farmer’s market so we were truly fulfilling the northwest food geek stereotype.

We had three different cheeses all from the pacific northwest.  They are all well known cheese makers and I’ve run into these cheeses since then at cheese tastings and counters around town.  That said all three are really delicious representations of pacific northwest cheese.  The Willamette Valley Cheese’s Boerenkass (a raw cow milk cheese) was mild, but really full of flavor and went really well with the bread and Fra Mani Sopressata. 

This was the first time that I had tasted Rivers Edge Chevre’s Up in Smoke (goat milk).  This was unbelievably fantastic.  I love goat cheese and I’ve never tasted a goat cheese like this – rich, smoky, creamy.  I’ve had this over and over again since this first tasting.  I liked eating it wrapped in the Iowa applewood smoked durroc ham we got from Steve’s Cheese.

The final cheese was from Estrella Family Creamery.  I first had their cheese after visiting the Ballard farmer’s market so this was not a new cheese maker for us, but it was the first time I tasted their Guapier (cow milk).  This cheese has a layer of ash running through the center separating the morning and evening milking.  There really was a stark difference in taste between the two sides and it made for a fun tasting.  It was a really delicious cheese that was really best – in my opinion – eaten by itself.

This was one of those really great cheese experiences.  The company was fun and casual and into the cheese. And the cheese lived up to the moment with great flavors.

Comments (3)

« Previous Page« Previous entries « Previous Page · Next Page » Next entries »Next Page »