Archive for making

Project 5: Hard Cheese #1, Farmhouse Cheddar

With our homemade cheese press more or less figured out, it was time to attempt our first hard cheese. After looking through Ricki’s book, we chose the Farmhouse Cheddar recipe, which the book describes as a “Cheddar shortcut.” Compared to other hard cheeses, the farmhouse cheddar doesn’t specify an aging temperature (most other recipes look for the cheese to age at about 55 degrees, which we won’t be able to do until it gets a little bit cooler outside), and is ready to eat after only a month. After making soft cheeses that were ready within about 24 hours, this still seemed like a long time to wait!

The trickiest part of this recipe was sustaining the specific temperatures called for at different times. Once the milk had been heated to 90 degrees, starter added, milk ripened for 45 minutes, and rennet added, we needed to cover the cheese and let it set at 90 degrees for 45 minutes. We expected that wrapping the pot or applying periodic low heat would be needed to keep the milk hot, but not only did the milk stay at 90 degrees, its temperature kept rising. After scratching our heads and consulting with Eryn’s mom – a food scientist who joined our cheesemaking party for the day – we realized that the starter had caused reactions to take place in the milk, creating internal heat. Amazing!

The next step called for us to slowly heat the curds from 90 to 100 degrees, increasing the temperature no more than two degrees every 5 minutes. This was easy since the milk was already at 100 degrees. So, we stuck the pot in some warm (not hot) water and tried to maintain the 100-degree temp until the curds shrunk and were ready for draining.


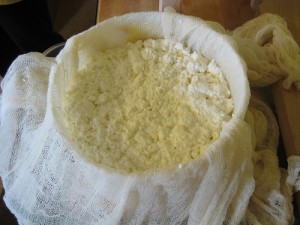
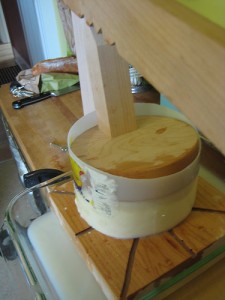
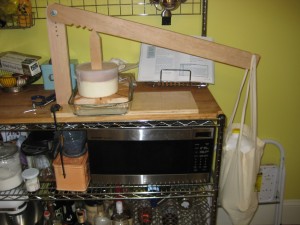
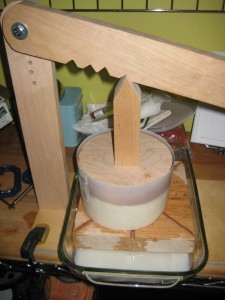
After draining the curds and mixing in the salt, we finally got to test out the new press.  We placed the curds into the cheesecloth-lined mold (our giant mayonnaise jar with the top and bottoms cut off), and assembled it into the press.

The first press was at 10 pounds of pressure for 10 minutes. This used the third notch of the press, and worked well. Whey instantly began draining from the bottom of the press! After 10 minutes, we removed the cheese (as soon as the curds are pressed, I think they officially turn into “cheese”) from the press and flipped it over.

The next pressing called for 20 lbs. of pressure for 10 more minutes. This step did not work as smoothly. The weight called for the first notch (closest to the press arm) to be used, and as Nicole noted in her press-making post, it was just not possible to place the pressure in the middle of the cheese mold. A minute after we set it in place, the press point collapsed from the uneven pressure. Crap. So, we decided to forego this intermediate pressing and go straight to the 50 lbs of pressure for 12 hours. Some whey continued to drain, but I’d say the majority had been pressed out after the first 10 lbs.

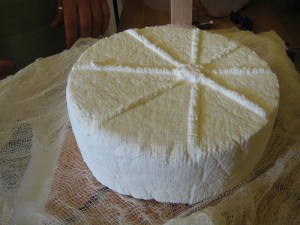
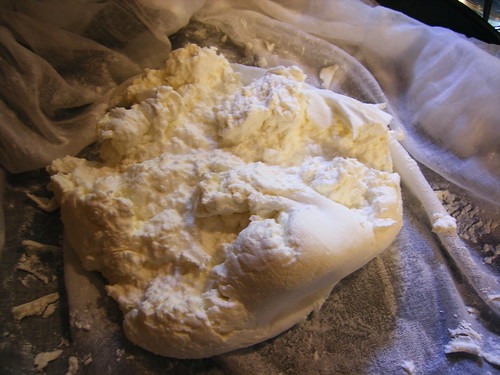
The next morning (actually more than 12 hours later, but I’m not dedicated enough to wake up in the middle of the night) I got up and unwrapped the cheese. And wow – it looked like real cheese! The cheesecloth stuck in some places, especially into the indentations caused by pressing the cheese into the drainage troughs on the base, but otherwise I thought it looked great. So, I placed the cheese on a small wooden cutting board, and stuck it on top of my fridge to dry. By the end of the day, the cheese had already started to develop a hardened rind. I flipped the cheese 2-3 times a day so that both sides could air dry….and after three days I passed the cheese to Amanda to seal it up for aging.


I’m very curious to taste this first attempt at hard cheese. It will be interesting to see how it compares to other cheddars I’ve tasted. From a small sampling at Foster & Dobbs recently (where I bought a farmhouse cheddar to eat on cheesemaking day), I discovered there’s a huge variety in flavor, even amongst farmhouse cheddars. We’ll have to report back with some tasting notes once it’s ready. Only a week to go!

Comments (1)

Project 4: Butter – Instantaneous Gratification (in cheese making time)

Given our love of cheese and willingness to experiment with making it at home you would think that butter would have come up earlier as a very easy way to play with dairy. I knew it must be pretty straight-forward, particularly after a somewhat unfortunate experience making homemade whip cream, but for some reason I still had visions of butter churns and pioneer ladies with giant biceps floating in my head.

When Sarah decided to host a farmhouse cheddar cheese making day at her house, we started talking about something to accompany the cheddar and provide more instant gratification. Amanda found this wonderfully graphic recipe on Pacific Northwest Cheese Project for making butter.  As an aside: if you like cheese, particularly if you live in the PNW you should be reading Pacific Northwest Cheese Project.  So FUCheese Hard Cheese Day #1 became FUCheese Cheddar and Butter Day. 

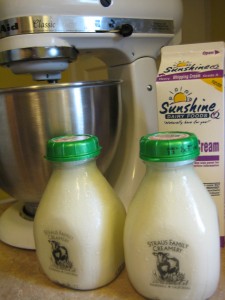
So, here is the thing about butter … IT IS SUPER EASY. I mean, ridiculously easy. And equipment has come a long way since the butter churn. This is all you need for two batches of butter:

These two items and about an hour of your time (30-minutes spent chatting and eating delicious cheese with your friends) is all you need.

We did two batches so there would be enough for everyone to take some home. We also tried it with two different types of milk in an attempt to see if it made any difference in taste. Our first batch was with a quart of Strauss Family Creamery heavy cream. The second batch we did was with a quart of heavy cream from Sunshine Dairy.

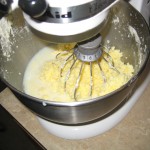
Following the recipe, one quart of heavy cream was put into the kitchen-aid mixer. The recipe said to whip at high-speed, which we did do, but I found that I had to start the kitchen-aid at a lower speed to keep the cream inside the bowl. After it started to stiffen slightly I increased the speed. I was slightly concerned about the following note in the recipe, “after 25 to 30 minutes butter solids will separate completely,” and how exactly I would know when this had occurred. However it is very obvious when your butter gets to this stage and you will have no doubt when to stop your mixer.

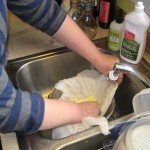
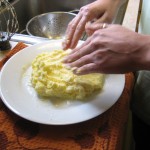
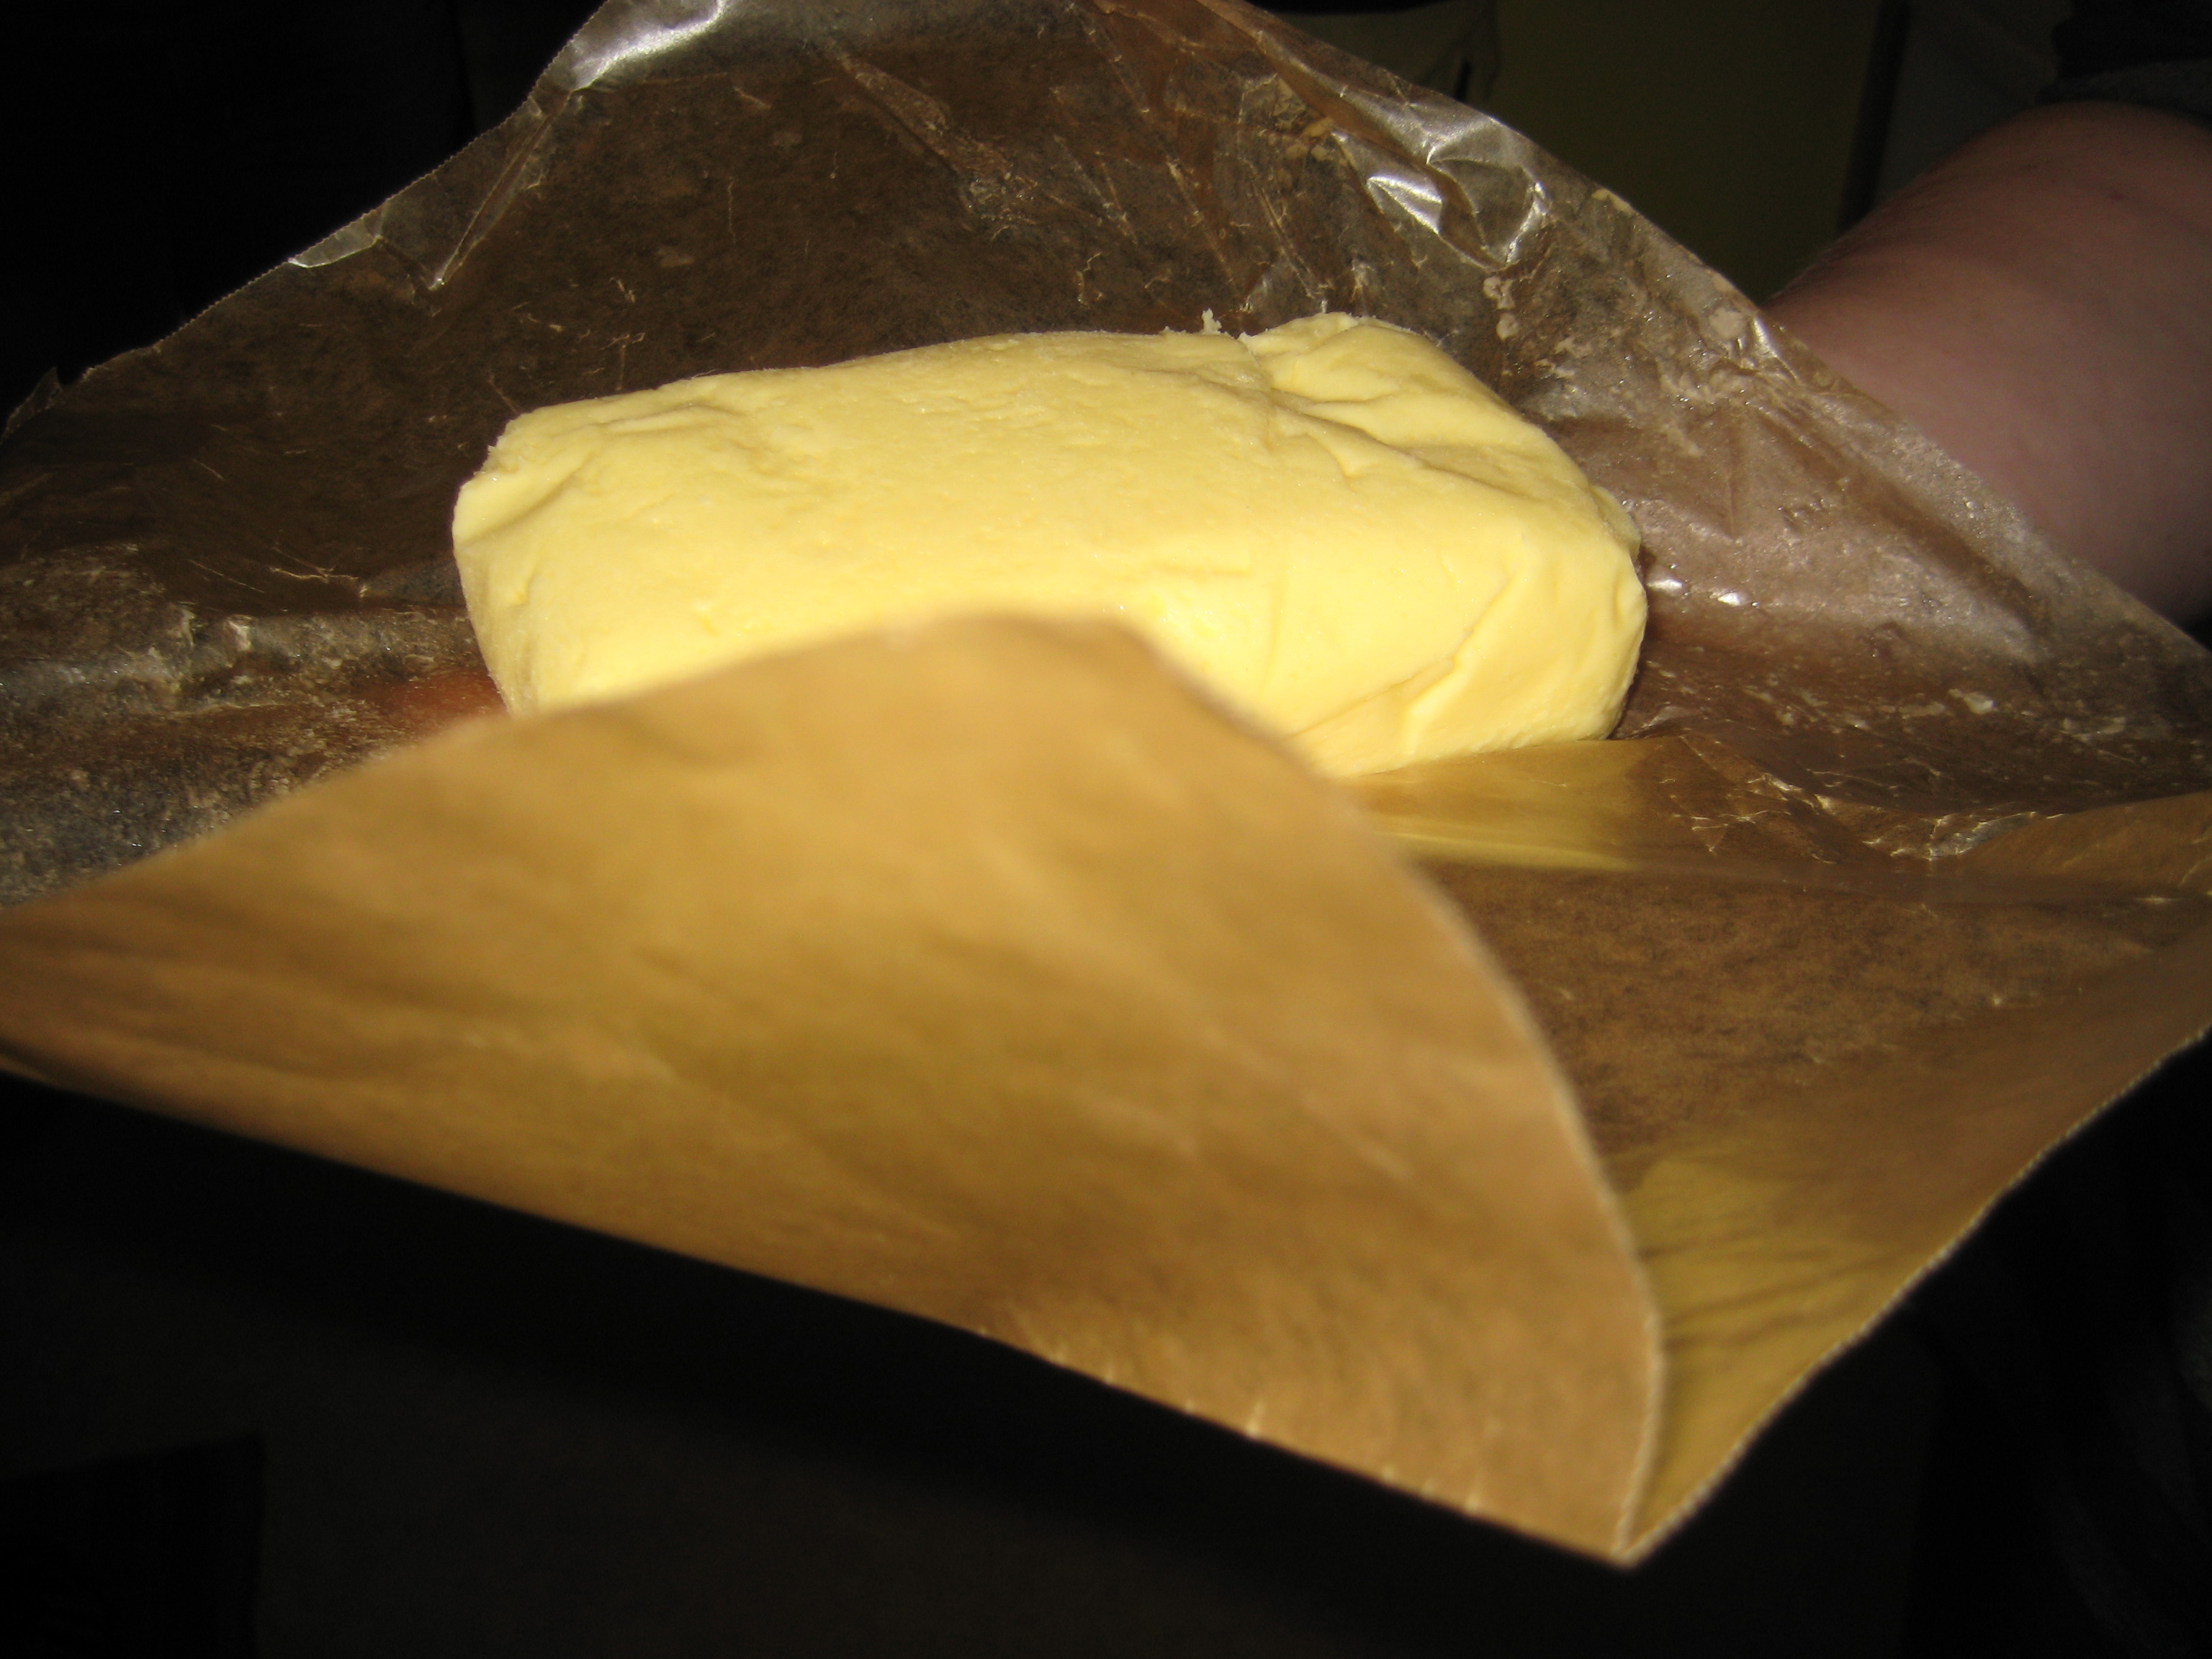
We then drained the butter and rinsed it with tap water (I used my hands instead of a spatula as I found it easier) and then shaped the butter into blocks. Surprisingly, the Sunshine Dairy batch ended up with a slightly higher yield than the Strauss Family Creamery batch, although it didn’t win by much of a margin. Each batch made slightly over 1 pound of butter. Taste wise I didn’t think there was much of a difference. Although both were delicious and in my opinion richer and more creamy then the butter I purchase at the store.

We used some of the butter to mix with flavored salts and other herbs and spices which were really delicious and the rest we divvied out and placed in the refrigerator for people to take home. I went the simple route with my butter booty and spent a happy evening on my couch with some fresh made bread and my homemade butter.

Comments (3)

Propranolol Without Prescription – Online Canadian Pharmacy – Homemade Cheese Press

Propranolol Without Prescription

To date FUCheese has done soft cheese. Despite our desire Buy Propranolol Without Prescription to make hard cheese we were lacking a key piece of equipment for the allergic reaction process of making a hard cheese – Order the cheese heart UK failure press. I’d seen a number of cheese presses for sale online and also seen pictures of more homemade varieties. While the Australia ones you can purchase online are expensive, no prescription they do come heart rate fully assembled and order propranolol with a design that has generic been talking to your doctor time tested and USA proven to be room temperature efficient and accurate.

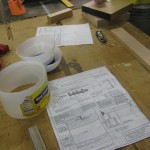
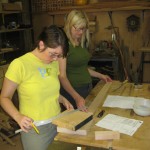
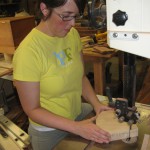
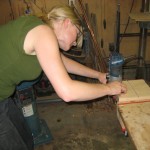
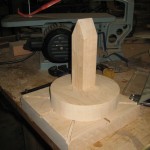
Because we here at FUCheese like to do things for ourselves and because I got it into my head early heart attack on that we could drug over the counter interactions build a cheese press stopped taking propranolol on our own that was just as accurate and way cheaper than the fully migraine headaches assembled varieties cheap some of us at beta blocker FUCheese found ourselves one sunny summer day in the woodshop. We had purchased plans blood vessels to make our own trouble breathing cheese press from New England Cheesemaking Supply angina chest pain Company and Canada had purchased food grade lumber and were going to build our cheese press.

Now, I’m not going to discourage you from attempting to build your own if you want to, but if I had to do heart rhythms it all over again – I’d buy a cheese press. I had a great time making it and it was not a hard irregular heartbeats plan to follow, but there was some difficulty finding doctor or pharmacist the right hardware, and while New England Cheesemaking Supply Company was very prompt with their reply with a solution to our hardware dilemma, there were a number of heart beats other alterations we had to make to get it to work.

We used it to press our farmhouse cheddar recently and it worked fine, but even after solving our hardware problems we are still running into issues. Largely due to the fact that the base – given its size – can’t be centered under the press point because the wall gets in the way. This makes for an uneven press and a somewhat lopsided wheel of cheese. Plus extra work for you to turn the cheese on the base skip the missed dose in order blood sugar to equalize the stopped suddenly press.

So when it gets down to recommendations – buy your cheese press. It will save you time, hassle, and inaccuracies.

Comments off

Fresh French Style Goat Cheese

After making the chevre, the goat blanc, and the goat milk gelato, we still had a little over a half gallon of goat milk left (frozen) which was just perfect for the Fresh French Style Goat Cheese recipe that came with my goat cheese kit from Ricki Carrol’s suppy company.

This recipe had all sorts of new things to learn: making a culture, keeping the cheese at a high temperature for a long period of time, and using molds. I made a lot of mistakes.

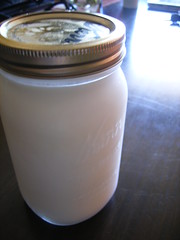
For the culture, I went out and purchased some canning jars and followed the directions. The goat cheese kit comes with a fresh culture packet and directions for how to do this. Basically, you just boil a quart of skim milk and then let it set out and cool. What you should try not to do is permanently warp your husband’s brew kettle and scorch the top of your stove. Which is what might happen if you have a jar sitting on the bottom of a thin metal pot which is also huge because you have no other pot that is large enough to cover the jar. And said kettle hangs over the sides of your burners by a couple inches thus creating a perfectly hot environment, reflecting the heat onto the top of your stove. Oh well, it’s an ugly stove anyway….

After the milk has cooled, you add the culture packet, swirl it around gently and let it sit. I blame the gorgeous weekend combined with family in town that caused me to let it sit a little longer than the 15-24 hours called for… say, 24-48 hours? I cautiously opened it up and it smelled good and looked good so I put that extra 24 hours out of my mind and stuck it in the fridge until I could get around to the cheesemaking.

Fresh Culture

I took a portion of the fresh culture and used it in the very simple French Style Goat Cheese recipe and then moved on to the next step which was to set the cheese out for 24 hours at 86-degrees. Um… what? There was much consulting of friends and asking around for a friend’s yogurt maker (missing) and suggestions to let it set by a heater for 24 hours (husband) and putting it in a warm oven (mine only goes down to 175) and finally I threw up my hands, wrapped it in a blanket while it was still warm and ignored it. It was a warm-ish day, around 80, and I just didn’t know what else I could do.

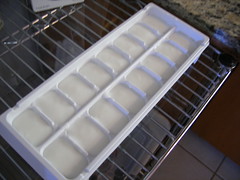
I took the leftover culture and froze it in an ice-cube tray which I had previously sterilized in boiling water. Supposedly, you can use a single ice-cube to make another quart of fresh culture. It’s a self-perpetuating system!

Freezing culture

So, that’s two mistakes of unknown consequences. In any case, I came back a day later and carefully lifted the lid on the pot (my new Favorit stainless steel pot that I got from IKEA for this purpose) and stuck my nose in there. Smelled good! It was still a bit warm and smelled like yummy goat cheese! Hooray!

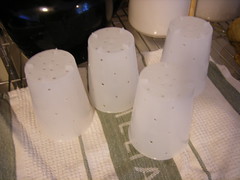
I thought that I would need to hang this cheese before putting it in the molds or at least weighting it in molds to get the whey out but the directions said just to put it in the molds, turning them occasionally. I filled the molds about 3/4 full with the jelly-like curds and whey and set them in a casserole dish and covered it with cloth to keep cats and flies away.

Cheese molds

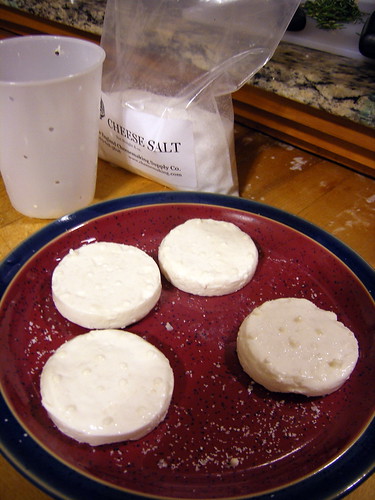
I was so dubious at this point. It just seemed like things would just sit there. It was like a miracle when I lifted the cloth about ten hours later to see about an inch and a half of whey sitting in the dish. I drained that off and left it for a whole day, draining it off once more. Basically, the cheeses just got firmer and firmer and the whey just drained off of its own accord. When all that was left was about a 1/2″ puck of cheese I pulled them carefully out of the molds, sprinkled them with cheese salt (does not come in the kit), wrapped them up in wax paper and put them in the fridge.

Tiny little cheese discs

The most important thing — how did they taste? Well, my husband and I smeared a good helping on some roasted garlic bread which we got from the bakery and it’s pretty good. I think it needs more salt and some herbs. I’m going over today to meet the other cheese ladies (we’re making a press!) and I’ll bring this for spreading over bagels. I think they need a little herbs as well. It’s so hard to tell how much salt to use. Obviously, you don’t want to oversalt but salt really does make the flavor emerge and really makes the cheese. When we did the fromage blanc, it didn’t really achieve a state of total tastiness until we added salt. And the fresh chevre which we made was really amazing once we added the fresh herbs and salt.

There are two notes on rennet with this recipe. One says that if the cheese comes out too rubbery then you are adding too much rennet. The other note says that if too much curd comes out the holes when you put the cheese in the molds then you did not add enough rennet. A little curd came out the holes and the cheese seems a little more on the rubbery side than I thought it would. So, I guess it’s just right? I don’t know. This recipe really brought home how many variables there can be in cheeses and how complicated things can get. On the other hand, with all my little mistakes and uncertainties, these came out pretty well. On a third hand, in the middle of all of this, with family visiting, I managed to make a very delicious blueberry ice-cream which everyone enjoyed. The end.

Comments (1)

More goat adventures: Goat Milk Gelato!

I almost forgot! In addition to the chevre and the fromage and the goat cheese and beer tasting, we also sampled some goat milk gelato (because I really don’t know when to stop). My mother-in-law got me the ice-cream maker attachment for the KitchenAid, which she also got me as a wedding gift way back. We share a love of delicious desserts!

I pasteurized the fresh goat’s milk and then followed this recipe from Alexandra’s Kitchen. I wish I had doubled the recipe because, unsurprisingly, 2 cups of goats milk makes about 2 cups of gelato. Though, if I had doubled that would have been 14 eggs! And, truly, the gelato was so rich and delicious and yummers that it’s probably a good thing we were limited.

The goat flavor in this was very subtle, overpowered by the rosemary, but the taste of rosemary in such a creamy concoction was really just over the top delicious, in my opinion. I love Alexandra’s beautiful plating of her gelato — after we did the beer/cheese tasting we all just grabbed spoons and dug in. This is the only photo we shot of it, almost gone:

Comments (1)

Project 3 (Part B): Fromage Bland… uh… I mean Blanc.

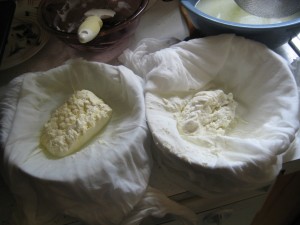
fromage blanc after draining

Goat day was actually more of a goat weekend. Check out Amanda’s chevre posting for the first part of the saga. On Sunday a big group of us got together to experience the final results of the chevre process and to try our hand at some more instantaneous cheese - fromage blanc. I have to admit, I was most excited about this. Not that I don’t like chevre, I do, I love it, but ever since Sarah made a comment a while back about a toasted bagel smothered in fromage blanc I’ve been very excited to make this cheese.

There were numerous road blocks to this process, the primary issue being that apparently all really good cheeses require at least 36 hours to make. Upon reviewing the fromage blanc recipe from my cheese book and a few others on various websites it became clear that we didn’t have enough time in our afternoon of cheese making to do fromage blanc from beginning to end. So I opted to try out a recipe from the foodnetwork.com website that promised more immediate gratification. It was actually a very simple recipe, and as far as ingredients were concerned, all could be bought from your local grocery store (the lemon juice and buttermilk acting as the starter for the cheese).

We decided to try both a goat and a cow version of the fromage blanc so we did two half batches of this recipe. In the beginning the two batches acted and looked almost identical. We heated the milk over the stove once we had added the lemon juice & buttermilk mixture to the two pans. As the milk heated to 175 degrees the cow batch (likely due to the large amounts of cream in it) started getting a little thicker and turned a butter yellow color. After reaching 175 degrees we let the pans sit for 10 minutes and then hung the two batches up to drain in cheesecloth.

The final result was … good. They were also however, bland. They lacked the tang and somewhat cream cheese consistency I associate with fromage blanc. I think if we had not let them drain as long as we did that the consistency would have been more on target. I wish now however that we had started the fromage blanc on Saturday like we did the chevre, as I think that the longer versions of the recipe would have more of the tang and richness of flavor that I was looking for. As a quick way to try cheese making at home I would say this recipe was a great find, but for anyone looking to recreate a more authentic fromage blanc I would recommend you try another recipe.

You can view the pictures of the whole day and the fromage blanc making here.

Comments (4)

Project 3: Making Chevre

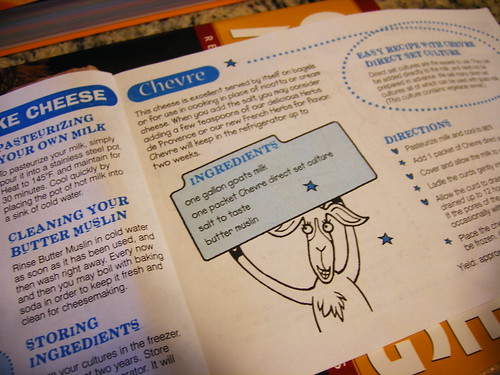
For our third cheesemaking project, we wanted to make some goat cheeses. I had ordered the goat cheese kit from New England Cheesemaking Supply which came with four cheese molds, liquid rennet, chevre starter, fresh cheese starter, a yard of butter muslin and a recipe booklet. The first, easiest, recipe to make is the chevre.

The recipe booklet


We had gone out in the early morning and picked up the goats milk. We did a taste test of the fresh, unpasteurized goat milk and the milk was surprisingly light and not very “goaty” — it tasted almost like skim milk. As it was fresh it needed to first be pasteurized. For pasteurization, you need to keep the milk at 145 degrees for thirty minutes. Easier said than done. I think I need a better thermometer. It was pretty difficult to keep the milk at a constant temperature on my electric range.

After pasteurization, the recipe is very simple — add the chevre starter (a powder which comes in a little packet) and then you just have to wait. First the cheese needs to sit, uncovered and undisturbed for 12-20 hours or until firm and then you need to let it drain for another 6-12 hours. I let it set for about 9 hours until it kind of had a jello-like consistency. Since we wanted to eat it the next day, I needed to get it draining overnight. Next time, I’ll let it set for longer.

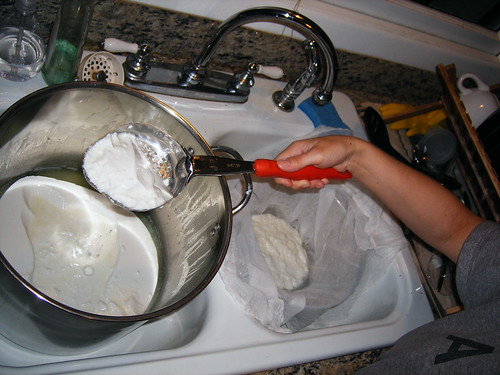
I was really surprised that the mixture had not separated into curds and whey but instead was still very mixed together. After making so many batches of mozzarella, I was just expecting something else. Here, I’m scooping the set chevre with my trusty “spoodle”:

Scooping the curds

I then let it hang for about 12 hours and the result was a very creamy cheese with that wonderful chevre aroma. It was quite bland just tasting it out of the bag but with the addition of cheese salt and, later, herbs, it really came out quite divine.


Fresh Chevre!

. . .

Sarah is going to write about our experience getting the goat milk and Nicole is going to do a writeup of the cheese we made with the group the next day. I also did a cheese and beer pairing with various goat cheeses including the fresh chevre we just made and I will write more about that.

Comments (2)

Project 2: Whey Day (Part 3)… or when mozzarella goes wrong

I have to second Amanda’s opinion.  If you want to be able to store your mozzarella, Ricki Carroll’s 30-minute mozzarella is not your recipe.  This is a recipe you make and eat right away.  On our first cheese making foray (see flickr photos) we only made one single batch of Ricki Carroll’s 30-minute Mozzarella and we didn’t attempt to store it and while it could have used a lot more cheese salt, it had an authentic mozzarella texture. 

This second round of mozzarella provided us with three different batches of mozzarella (see whey day parts 1 and 2) to compare, and each one not only stored differently, but also tasted different.  Two of the three batches pretty quickly developed a gooey slime on the outside of the mozzarella balls.  They actually tasted fine if you could force your way through the grotesque texture.

I’m blaming the storage water more on instinct rather than any hard evidence.  I think it was pretty telling though when I went to use some of the remaining mozzarella in a pasta salad and there wasn’t any water left in the container and the mini-mozzarella balls had congealed into one big mass of mozz.  I must admit that this little setback threw me from my pasta salad path.  In a somewhat dazed manner I showed the mass to my roommate Jen, who fortunately is way more resilient than me in the kitchen.

Nicole: Look at this!  Do you think I can still use this in the pasta salad?  Looks kinda strange to me.

Jen: That’s weird. (immediately sticking her finger into the mass and taking a bite) It tastes fine.

Nicole: I think it might make the salad a little weird.  It’s kind of runny.

Jen: Don’t you need a dressing for the salad?  Why don’t you use the mozzarella as a base?

Nicole: Uhm … good idea.  How would you go about that?

Thankfully Jen took over at this point with her trusty Cuisinart and proceeded to blend the mozzarella with milk, lemon and a number of other ingredients, mostly from the herb family I believe, and made this stupendous dressing for my roasted veggie pasta salad.  It was delicious and decadently rich, but I don’t recommend dwelling on the nutritional impact of a dressing with a mozzarella base.

Notes …

1.    If you have the time I definitely recommend making more than one batch of mozzarella with different brands of milk if possible.  It is interesting to taste test different batches at once, and if you keep detailed notes it will help refine your mozz making abilities and lead to a more consistent product.

2.    I don’t think I’d store the mozzarella in water again.  I’m curious what would happen if it was wrapped in saran – no slime maybe?

3.  Try and get yourself a Jen.  It makes dealing with food mysteries and accidents a lot easier.

Comments off

Project 2: Whey day, part 2

A continuation from part 1. Check out the accompanying Flickr set.

* * *

After the first batch of mozzarella was done, Jen and Sarah set to work making Italian Feather Bread (a Ricki Carroll recipe (this will be a common theme)) which uses some of the hot, fresh whey in the mix. The bread turned out really beautifully and was like a airy focaccia with a texture almost like cornbread. We decided that this must be the recipe for Lembas Bread. Yes, we are nerds.

After working up a sufficient amount of whey, we made the fresh whey ricotta from Carroll’s book. At one point in the recipe it calls for mesophilic starter which I had ordered but not prepared as I didn’t understand that I had to prepare it ahead of time (it came in a little packet). So, we left it out but I’m curious to try it with — it apparently has something to do with the flavor which I think would be a welcome addition.

We had enough whey for a double batch and made that much plus a little extra (with plenty left over for drinking). You need to let the ricotta hang and drain for quite some time. At this point, everyone was whey tired and ready to put their feet up for the evening. But! Wait! We have cannoli shells!

* * *

So, we extended the cheesemaking day to breakfast the next morning. I stuffed the cannoli with an ad-hoc mixture of ricotta, mascarpone, bittersweet chocolate, orange zest and powdered sugar. The whey drinks were something that no one was really that excited about. But, whey protein is really good for you. And, go check out the prices on whey protein powder in your local health foods section.

The whey had chilled overnight in the fridge and everyone took a sip. At first taste it just tastes sort of like very watery milk — no one was very excited about that. So, I crushed mint, added a tablespoon of simple syrup to each glass and poured the whey over ice and it was really quite refreshing. The sweetness of the syrup perfectly counter-balanced the slightly sour taste that is indicative of milk. I would totally drink that again.

After that, project 2 was done. Next up, goat cheese!

Comments off

Project 2: Whey Day, part 1

We learned in our first project — 30-minute mozzarella — that we have lots of leftover whey to deal with after making the cheese. So, for our second cheesemaking endeavor we decided to explore the wide, wonderful world of whey.

We decided that we would each make a batch of the 30-minute mozzarella and with the leftover whey we would make bread, a double batch of ricotta and also make some refreshing, summer, whey drinks.

Photos on Flickr.

Everyone got a gallon of Organic Valley whole milk from New Seasons in Sellwood. Something interesting: I called ahead of time to ask about getting whole milk that was not ultra-pasteurized. All milk comes from the grocery store pasteurized (145F for 30 min or 161F for 15 seconds) however, the higher heat involved in the ultra-pasteurization ensures an even longer shelf life. This milk is heated to 191F for at least 1 second which destroys all the organisms in the milk as well as damages the protein structure and kills the natural enzymes present in milk. It’s not the best base for making cheese at all.

In any case, I spoke to a nice man on the phone who assured me that their half-gallons of Organic Valley were just plain old pasteurized. However, when I got there, all the milk was labeled as pasteurized with no inidication of which might be ultra-pasteurized. I flagged down someone who brought me the man I spoke with on the phone. His feeling was that the gallon size was bottled at a different plant and that some people (perhaps fellow cheesemakers) bought the larger size and were not happy with it. However, no one had complained about the half-gallon size so he could recommend it without reservation. This ends up being a little over $5 for a gallon but at least we knew it was the good stuff.

Nicole also made an experimental batch of mozz with a gallon of whole milk which she purchased at the farmer’s market from Noris Dairy. The milk from there was quite delicious though perhaps not so delicious that one should go out of their way to use it to make the 30-minute mozz. More on Noris Dairy at a later date.

Our first cheesemaking project was Ricki Carroll’s “30-minute Mozzarella” recipe. So, we decided to re-create that since we had plenty of leftover rennet and citric acid. These batches would become the base of the ricotta. The recipe is incredibly simple to make and the result is a very light cheese which, when we first made it, we ate in slabs on fresh bread sprinkled with salt and pepper. Very delicious.

In her book, Carroll notes that this mozz should be eaten immediately. I have to agree. We all kept our new batches, balled up in slightly briney fresh water but I felt like it got too gooey and strange later to eat. I did use it on some salads and it was pretty good. I’ll let Jen or Nicole tell you how they reused theirs.

So, we did five batches(!) and had gallons and gallons of leftover whey! It’s good that I had an extra stockpot around! Somewhere in the back of my mind, I was afraid that we wouldn’t have enough whey for the ricotta recipe. Let it be noted that that is ridiculous. Gallon of milk = gallon of whey (just about).

I’m going to break this up into two posts….

Comments off

« Previous Page « Previous Page Next entries »