Yogurt! It’s not going to make itself, you know?
I can’t say that yogurt was at the top of my list when I set out on this cheesemaking adventure (oh, sweet mancheeeegooooo….) but I am glad that I tried it. It is fairly simple to make and easy to source the ingredients. Everything can come straight from your happy local grocer.
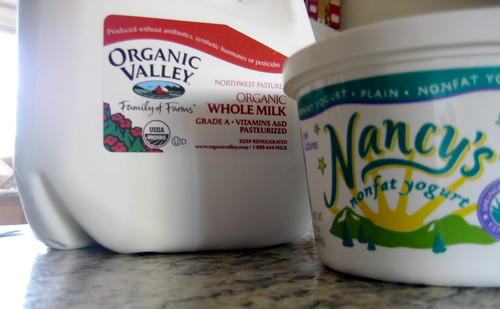
We used this well-documented recipe from Dr. Fankhauser’s great collection of how-tos on cheese and dairy. We used Nancy’s yogurt because it’s local (and delicious) and is also made only with milk and cultures. We also used this handy digital thermometer that my husband bought for using in beer brewing and with his smoker.
You can set it to a temperature and have it alarm you when it reaches that temp and you can have it read either celsius or fahrenheit. Fankhauser’s recipe was noted mostly in celsius and so we set the temp that way. One of our biggest challenges thus far has been keeping an eye on the temperature and not letting the milk get too hot and burn. Having to remember to check back with thermometer in hand has often meant that we’ve missed it when it has gotten too hot. It also helps to maybe not drink so much wine while cheesemaking. (Your mileage may vary.)
It took about an hour to let the milk get to temp — 85-90 C (185-195 F) — on medium heat, stirring periodically to get an accurate temp reading. I think it went a bit faster when I put the lid on (shush) and just went back every ten minutes or so for a temp check.
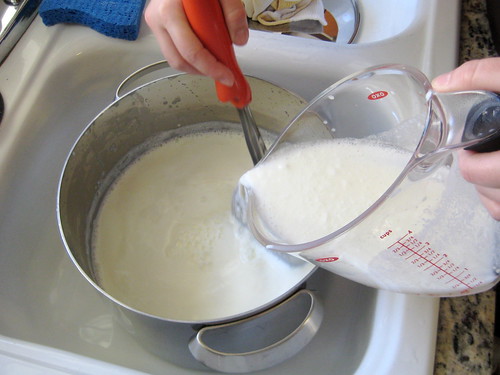
After cooling the milk and homogenizing the starter, we added it to the milk, stirring to incorporate. Then we transferred the milk/starter into four quart-sized canning jars, which I had sterilized previously. It actually would have had enough for another half-quart so if you have an extra quart or smaller jar at the ready you may get a bit more.
Lastly, we needed to let it incubate for at least three hours at 50 C. You can find on the market special yogurt makers which do just this — keep the culture at the proper temperature for a long period of time. However, Dr. Fankhauser suggests an exceptional method: using a cooler!
We used very hot tap water and brought the water to a temp of around 47 C. Our instructions warned us not to let the temp get above 50 C so we thought this was pretty good. We let it sit for three hours (closed lid, of course) and it had cooled to about 45 C in that time. We were impressed! This may be the solution we need for keeping cheese milk at temp for a long period of time.
* * *
While it was incubating, Nicole and I made a trip to Bob’s Red Mill. Do you know this guy? Have you been? I had a Chinook Book coupon for half off one item and my friend Leah convinced me that I should buy a 25lb bag of white flour and then trade half of it for half of her Bob’s Red Mill 25lb bag of whole wheat flour. This sounded like a great idea at the time (there was wine) and so that’s what I did. Plus I got yeast, steel cut oats, granola and coarse cornmeal. I resisted many, many other interesting things. So, I guess I have some baking to do….
* * *
When we got back, Nicole and I still had about an hour of waiting so we made some cheese plans for the year and looked up some cheese events and plotted total cheese domination. When that was over, we checked on the yogurt. And… no gelling! We panicked a little bit — okay, I panicked — and then started looking up other yogurt recipes. Most called for anywhere from 4 to 24 hours of incubating. We took some of the cooler water out of the cooler, heated up more water and added that — careful not to go over the line of the jar lids — until it was back up to about 47 C and then left it. Another three hours and we had gelling. By bedtime, they all looked really good (about 10 hours by that point). I went ahead and left them until morning. There may have been more gelling after that but I couldn’t tell. I popped them in the fridge and let them cool for a day.
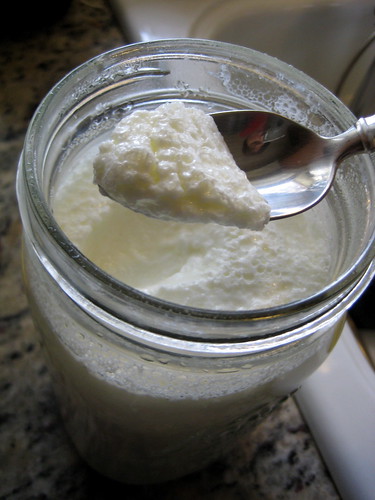
And here’s what it looked like when I took it out for a test run:
Perfect, I say!
It was very tangy, light and really quite delicious! I may try the suggestion of adding 4 Tablespoons of powdered milk prior to heating to get a firmer yogurt. But, really, this yogurt is awesome. You can also save 8 oz of this to use as starter for the next batch which would save a few bucks.
To see more photos of the process and a little more commentary, go to my flickr set here.


David Fankhauser said,
February 14, 2009 @ 10:55 am
Bravi. You made YOGURT! Thanks for the credit to my recipe. My suggestion about why it didn’t gel in 3 hours is that the yogurt you used as starter was less than optimally active. if you want to use the same starter next time, two suggestions: 1) be sure that the expiration date is no where near to the time of purchase (pick the freshest for starter).
2) If you want to use the same starter (I still have best luck with Dannon, even if it IS a large corporation)l, use twice as much inoculum. It won’t hurt, and you may get more rapid congellation.
Lastly, commercial yogurt MUST be more solid so that it can be shipped and still be in one piece. BUT… homemade is more delicate, tender, and succulent. You might learn to love the delicate texture compared to the thick, turgid nature of commercial yogurt. I prefer home made…
David Fankhauser
Nicole said,
February 14, 2009 @ 6:15 pm
I just had to pipe in and agree with you Amanda. The yogurt is delicious. I’ve been eating it for breakfast for the last week and each time I become more and more enamored with the yogurt. I’ve just been adding a little sugar and vanilla to sweeten it a tad and then doctoring it up with some dried cranberries and almonds.
I can really tell the difference between this and store bought yogurt. I also think it will make an excellent substitute to sour cream. Sometimes the store bought plain yogurt I buy for that purpose is still too sweet, or else to thick.
Given the excellent new temperature gauge and the fantastic addition of the cooler technique for keeping milk at a specific temperature I can see replicating this recipe often since, as Amanda said, it is pretty easy and actually not that time intensive.
Kimberly said,
February 23, 2009 @ 10:31 pm
I’ve been following the cheese making from afar (out in Iowa) and drooling as I watch the cool things you guys do. I have to confess that I have a vintage (as in mustard yellow, and older than I am) yogurt “maker”. Aka, steady temp provider. But, I love making my own yogurt. Another thing you might try, and that I do out here, is buying actual yogurt starter/culture. If you can’t find a commercial yogurt blend that works for you, you can actually just buy the yeast (like with bread for example). It works for me out here with the lack of organic packaged yogurt. I also tend to let my yogurt ferment for up to 24 hours for extra tangy taste.
You can also use small jars, put a dollop of jam or honey at the bottom, and you have created your own travel ready breakfast!
Amanda said,
February 24, 2009 @ 11:14 am
Great suggestion, Kimberly. Thanks for reading — your blog looks great! Did you know we are architecture people?
Claudia said,
March 1, 2009 @ 2:52 pm
Hi all, I was so happy to find you after weeks of searching for other cheese makers in Portland, OR! I thought you might be interested to know that I am starting up a cheese making kit and supplies biz right here in our west coast. As I’m sure you’ve notice all things DIY cheese seem to come from the east coast or eastern Canada. I’m hoping to sell the kits at new seasons, co-ops, and a farmers markets.
Let’s keep in touch, I loved reading your adventures in cheese making, the ups and downs are all part of the fun eh? I tried a new milk and made queso blanco and paneer last night…more unlabeled UHP milk! But I have my first batch of raw milk feta curing the in the fridge…3 months wait! Happy cheese making, Claudia
Amanda said,
March 1, 2009 @ 3:26 pm
Claudia — that sounds really great! Let us know when you launch!
Maureen said,
April 24, 2009 @ 5:53 am
Your yogurt looks like my yogurt did, which is reassuring. The subtle texture was different from store bought — so much so that my partner wouldn’t eat it, and I ate a lion’s share — but I’ve since heard that extremely stable setting conditions minimise that. Thoughts?
Also, Claudia, I am emailing a friend back in SF pronto about your news, because you’re right about the lack of cheese making supplies on the west coast. Thanks!
FUCheese » Making Yogurt Again said,
April 25, 2009 @ 9:25 am
[…] our first foray into yogurt making, we followed Dr. Fankhauser’s wonderful recipe, with great results. We used an organic whole milk and Nancy’s yogurt. Nancy’s is an Oregon brand, made in […]
FUCheese » Feta! Feta! Feta! Oy! Oy! Oy! said,
June 20, 2010 @ 8:17 pm
[…] time we do this we’ll make yogurt during those waiting times. Mmmm… yogurt. It’s been awhile since I’ve made that. So good. Must do that again […]